


I've got a guest room that was in need of a table where guests (my mom) can put their makeup bag, hair stuff, etc. I didn't need a big dresser since, let's face it, NOBODY comes to visit and puts their clothes in the dresser. Right? Just a console table/sofa table type thing.
So I found this little beauty (ahem!) on Craigslist for $20. One small issue - it's ugly, doesn't match anything, and is reeeeeeeally dated looking.

BUT it was the right size. It's about 4' wide, tall enough to put a chair in front of it and sit there to get ready in the morning, but only about 14" deep so it doesn't stick out from the wall too much. And I can use it as a sewing table since the guest room is also my craft room - bonus!
So I decided to try my hand at refinishing furniture, something which I know absolutely nothing about. My guest room is gray and yellow, with splashes of teal so I wanted the table to be gray. I thought about chalk paint (never had even heard of this before two weeks ago - God bless Pinterest) but I wanted a more metallic/shiny finish. I was really digging those silver metallic pieces of furniture that I'd been seeing everywhere lately so I set out to discover how to do this myself.
The good news is it's so easy and requires very little skill! Take a look at the finished project:

So here's how to do it. I'm sure there are a million other ways to do this but this is what I did and a) it was inexpensive, b) didn't require fancy tools, and c) was easy.
You Will Need:
- Sandpaper in a medium grit and fine grit (if you have a power sander it's even easier)
- Metallic spray paint, probably 2 cans
- Dark glaze for antiquing. I hear you can make your own by mixing stain and Old English dark furniture oil, but I just bought some
- Spray clear coat, 1 can should be plenty
Step One: Sanding
Since I was going to paint this it was not necessary to strip the old finish right down to the wood. I sanded by hand just enough to take the shine off the table. I was pretty good about doing the table top but I really slacked off on the legs since it's hard to get in those little crevices. Just saying…
Step Two: Spray Paint
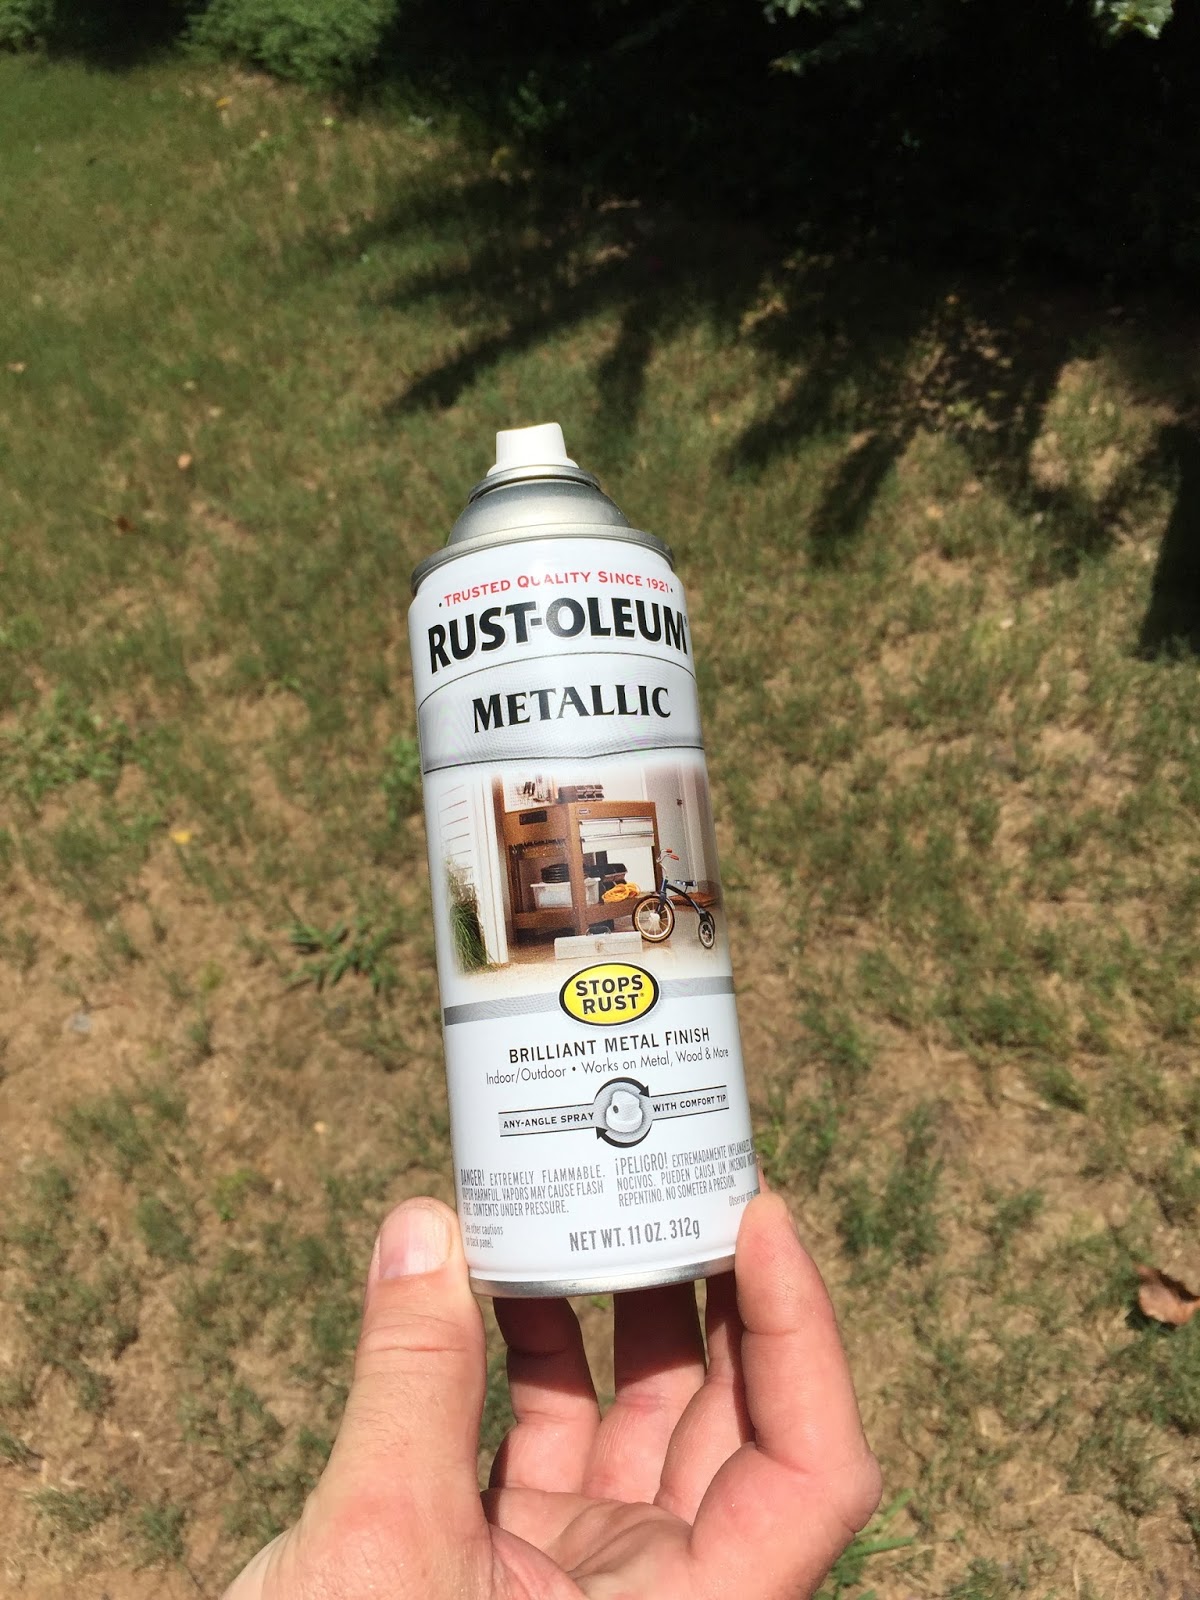
I bought Rustoleum Metallic silver spray paint. There are so many colors of silver, it was hard to choose. But this was the light silver I was going for.

Here's hubby taking over my project, as usual. ;) He LOVES building/painting/making things and couldn't stand to be the photo taker, so I let him start the painting.
Do this outside when it's not too windy, for obvious reasons. It was 95 degrees out and we thought we were going to pass out but the table dried in about 2.4 minutes so that was a bonus.

Go over the whole thing pretty lightly. We are going to sand it to distress it so no need to go heavy with the paint if you're just going to rub it off again.
Hey honey, you know that black nightstand we have next to the bed? That would look really cool with this treatment too, don't you think?

Let it dry, then spray it all again with a second coat but again, be light handed about it. Here's what we've got so far.

Now for the sanding. I tried by hand but man, that paint was TOUGH. It would NOT come back off. I tried three different grits of sandpaper and was making very little progress. So hubby had to bust out his power sander. He went a little crazy with the sanding and distressed this much more than I had originally planned. Remember Tim, the Tool Man, Taylor? That's my DH.

I had only planned on the edges and corners so when I first saw this, I had a mild panic attack. But truly, this looks great. You want to sand everywhere that would normally wear off over time. So concentrate on the edges, corners, right around the knob on the drawer, the bottom of the legs where you bump into them with the vacuum cleaner, and on the surface of the table in random spots.
After you're done sanding, dust it or vacuum it and wipe it down with a damp rag to remove all the sawdust. Let dry.
Now for the antiquing! This is really all about experimentation. I wanted to use a black glaze, specifically the Martha Stewart Black Coffee glaze I thought they sold at Home Depot, but was informed it had been discontinued. So I ended up getting a Rustoleum glaze in dark brown. (No, this post is not sponsored by Rustoleum. I'm sure they've never heard of me!)
You take a dry rag, dunk it in, and wipe the furniture down. Then you wipe it back off with another rag.

I started with a damp rag for removing the excess and wiped it off almost immediately. But this removed ALL of the stain. So then I tried letting it sit for a few minutes before wiping. Better, but still not enough.
So then I tried letting it sit for a few minutes and wiping off with a dry rag. SCORE! So it really is all about trial and error. Start on the back of the piece where no one will see if you mess up while you practice your technique. I saved the table top for last since that's the most visible part and the part you want to make sure you don't screw up. ;)
You also want to let the glaze goop up in the crevices and not wipe much back out for an aged look. Then wipe the glaze over the entire piece of furniture as well. I had to go over the really bare spots from the super wazoo sander with glaze several times to get it dark enough.
This photo below shows how I'd been wiping with a damp rag to remove the extra glaze. It almost all came off except where I couldn't get the rag into the tight nooks and crannies. After this I started wiping with the dry rag and liked the effect much better.

The final color was different than I thought it would be. When I used a brown glaze over silver paint, it came out part silver, part gold, and had a sort of greenish overall hue. That was unexpected. But I love it! However, if you really want a silvery look use a black glaze, or even a dark gray. That way in the spots where the bare wood shows through, you can color those spots to be less brown and more gray/black. OR you could spray paint a coat of black first, then a coat or two of silver. Then just be sure to sand until you hit the black paint but don't go all the way down to the bare wood.

Also keep in mind the base color of the piece. For example, the brown table and the black nightstand have very different overall colors due to the under layer that shows through after distressing.
Let dry a few hours and then spray it all with a couple of coats of clear protectant. I used this one:

Once dry I added a new knob, hauled them upstairs, and proudly placed them in the guest bedroom. Then I attacked that mirror with the same treatment since it was gold and hideous. I got it free years ago and only kept it because it's huge and something this size would have cost $100, but the finish was sooooooo ugly. I didn't do any sanding, just silver paint and wiped with the antiquing glaze. And voila!

I could have completed this in one day but the evening I planned to spray the clear coat it started thunderstorming, so I had to haul it back into the garage. It was dark out and hard to see so I waited till morning to resume. But the clear coats dried in no time and I put them in the room after a couple of hours.
I'm very pleased with the final result, considering I had no idea what I was doing. Imagine how good I'll be with a little practice! Now to find the perfect chair to go with this little desk.
There are many ways to update your furniture. For example, you can reupholster your pieces to give them a new look. Reupholstering your furniture is environmentally friendly and can give your home a more modern look at Easy Shed Coupon Code. You can also add bold accessories, like throw pillows, to give your furniture a more chic look. Regardless of the style of your furniture, it's easy to make it look new with a few easy DIY projects.
ReplyDeleteI'm grateful that you produce content of such high calibre. This essay is outstanding in my opinion. Every student in the class is improving their writing skills. Share more articles about this topic. It's time to start tearing down the inside so we can find out more. The Thomas Cook Coupon can help you save money.
ReplyDelete